Quick Answer
How do you adjust a losing bull put spread?
There are five main ways to adjust a losing bull put spread: roll the spread out in time to a later expiration; roll the strikes down to a safer level in the same expiration; reduce position size to protect capital; convert to an iron condor by adding a call credit spread above price; or roll an ITM spread to a far OTM position in a later expiration. The right adjustment depends on how far price has moved, how much time remains, and whether volatility is rising or stable. When in doubt, closing is better than adjusting at a disadvantage.
Table of Contents
hide
Master the Bull Put Spread: Complete Learning Path
First Step: Identify the Type of Trouble
Most traders react emotionally when their bull put spread starts losing. Pros don’t. Before adjusting, they diagnose the type of problem — because the correct adjustment depends entirely on the market behavior.1.1 Slow Drift Toward Strike
- Delta rises gradually
- Market still stable
- No volatility spike
1.2 Sharp Drop (Volatility Spike)
- IV expands rapidly
- Bid/ask spreads widen
- The trade becomes unstable quickly
1.3 Strike Breach (Short Put ATM or ITM)
- Delta climbs quickly
- Short put behaves like a long stock position (high gamma exposure)
Adjustment #1 — Roll the Spread Out in Time
Rolling is the most common professional adjustment. It gives the trade more time to recover while letting you shift your short strike farther out-of-the-money (OTM). Why pros roll early: Professionals don’t wait until delta explodes. Rolling when delta is only beginning to rise — typically in the 25–35 delta range — keeps the adjustment inexpensive and preserves flexibility. Early adjustments also prevent emotional spiral decisions later, when losses are larger and choices are limited. By acting early, pros avoid the trap of “hoping” the market bounces. Hope is not a risk-management tool, and rolling early replaces hope with a structured, proactive plan. If you want to see how I choose my original strikes before any adjustment is needed, I walk through the full process in this guide: How Pros Select Bull Put Spread Strikes for Monthly Income.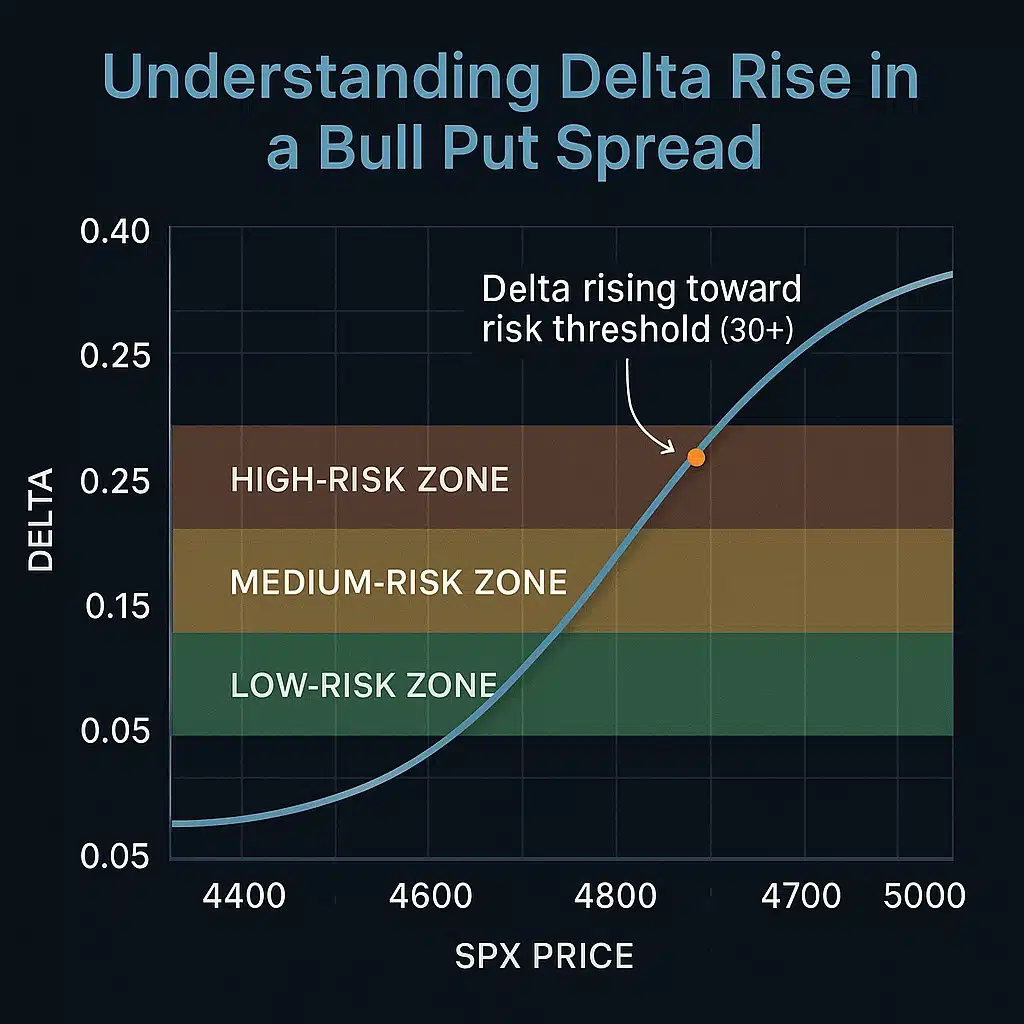
When to roll out:
- Delta reaches 25–35
- Price moves against you, but trend isn’t broken
- There is still significant time value left
Why rolling works:
- Extends duration → more theta decay
- Allows shifting short strike further OTM
- Often provides additional credit
SPX Example:
Let’s say you sold the 4850/4800 spread with 5 DTE and SPX drops toward 4875. You roll the entire spread out to 21 DTE and reposition to 4750/4700 for a credit. Now your trade has more time, lower delta, and better distance from the price.Adjustment #2 — Roll the Strikes Down
This is ideal when the market pulls back slowly but hasn’t triggered panic. You stay in the same expiration but move your strikes to a safer level.When pros roll down:
- 7–20 DTE remaining
- Price nearing short strike
- Trend intact; selling pressure mild
Why it’s effective:
- Immediately reduces risk
- Lowers net delta
- Keeps expiration close → faster theta benefit
Example:
Original: 4900/4850 Rolled Down To: 4800/4750Adjustment #3 — Reduce Position Size
This is one of the simplest but most underrated adjustments in trading. Retail traders try to “repair” trades. Professionals focus on protecting capital.How to reduce size:
- Close 50–75% of the position
- Reopen a much smaller spread further OTM
- Or close everything and re-enter half size later
Why it works:
- Reduces stress and emotional pressure
- Reduces margin usage
- Protects account equity during volatile periods
Adjustment #4 — Convert to an Iron Condor
When the market is drifting lower but still range-bound, adding a call credit spread above the price can neutralize delta and bring in more credit.When this works well:
- IV is high
- Market remains inside a range
- You want to reduce downside bias
Adjustment #5 — Rolling ITM Spreads (Pro Technique)
Rolling an ITM bull put spread is advanced but extremely powerful when done correctly.When pros roll ITM:
- You want to avoid assignment
- Market is stabilizing after a drop
- You still want to stay in the trade
Golden Rules of Rolling ITM:
- Always roll to far OTM, never to another ITM strike
- Increase duration
- Improve strike distance
Example:
ITM spread: 4850/4800 Roll → 4700/4650 with more time.When NOT to Adjust
Sometimes the smartest decision is simply to close the trade. Professionals close early when:- Less than 3 DTE remain
- Major technical support has broken
- IV is exploding higher
- The spread is deeply ITM
- An adjustment would increase risk instead of reducing it
Quick Adjustment Framework (Pro Checklist)
- Strike breached? → Roll ITM or close
- Delta rising fast (25–35)? → Roll early
- IV high? → Reduce size or roll down
- Support holding? → Roll out or down
- Time too short? → Close immediately